


This would have been my entry for the 2002 Oz Golden Demons. Due to unforeseen circumstances, however, I not only didn’t get it finished, I wasn’t able to make it to GD anyway…
Apologies for the state of the pics in this one. This tutorial was one of the first I put together with my first ever (not very high-end) digital camera and it did the job ok back then, but by today’s standards it was a bit rubbish. Also these pics were taken under a single desk lamp, and if the camera had a Macro mode (I don’t think it did) I wouldn’t have known how to use it… I debated not including this article as a result, but decided that it was still potentially interesting as an example of how far things have come from where I started.
The entry is a duel, between a Dark Angel and a Fallen. I wanted something fairly uncomplicated, due to time constraints, and the Space Marine plastics lend themselves well to easy conversions. I also wanted something other than the standard “two models looking fiercely at each other”, which is what most duel entries seem to be.
The Marines, eventually, would look something like this:
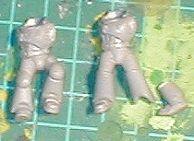
…and would be duelling on a big rock, amidst a ruined building. The Angel is leaping forwards, grasping the pistol hand of the Fallen, who is slipping backwards in mud, about to fall off the side.
Next: The Base
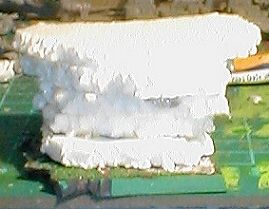
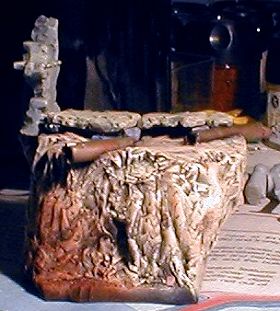
The Base
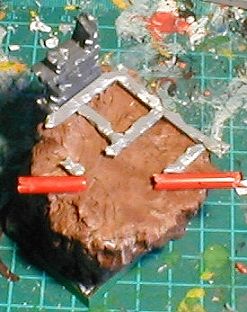
The base, initially just layered polystyrene…
Then adding putty to build up the rock texture…
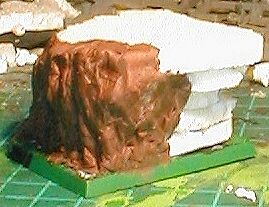
I’m using Selley’s Kneadit (the copper coloured one, because it was on clearance at work, so I got it real cheap.) This is a two part epoxy putty which is brilliant for this sort of work, as it sets in about 5 minutes. You can work it easily with a wet tool, or carve and sand it when set.
And finally the base fully covered…
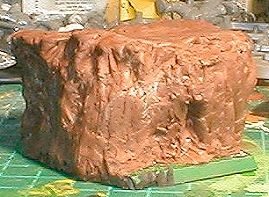
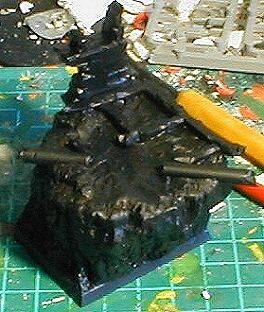
Next step is to start building up the detail on the top (remains of a ruined building, lots of mud) so I can start assembling the models around it…
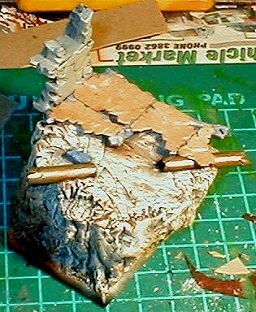
The base takes shape…
The pipe was made from a section of plastic tubing from an aircraft kit. I cut up pieces of sprue to make the grey squares… these will be the mounting for the tiles. The wall section is cut off one of GW’s ruined building sections.
Next: Painting the base
First off: undercoat:
Followed by a heavy drybrush of Bleached Bone, and then a highlight of Skull White…
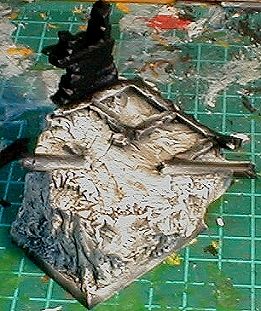
“Why am I drybrushing on a GD entry?” you ask in amazement… Well, I think drybrushing is the best way to get a natural rock texture. It takes a bit of patience to do it right, but the end result is worth it.
Finally, the pipes and floor support are painted…
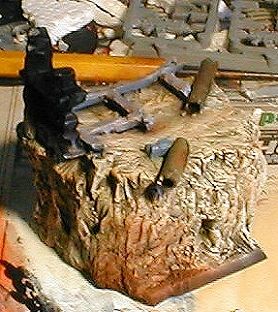
I have also added spots of Bestial Brown over the rock to dirty it up a little, and a splash of brown also down the corner below the pipe, where the runoff would be. The pipes are painted with TinBitz and Beaten Copper, spotted with Goblin Green. The floor support (the grey thing) is Shadow Grey with progressive amounts af Ghostly Grey and Bestial Brown mixed in. These will be partially covered with broken tiles, hence the need to paint them before actually finishing the base.
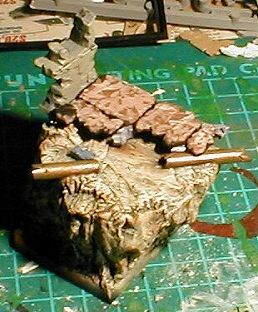
The tiles in place…
Tiles were done with cardboard (the unshiny kind, as this gets a nice stone look when drybrushed. The inside of a cereal packet is perfect), cut to shape and glued onto the frame. There will be shards of tiles littering around the place eventually, sticking out of the mud…
After some feedback from the good people on the modelling board at Dakka, it was decided that the cardboard tiles were just too thin, and had to go. So I ripped them off, and made new ones by pressing Kneadit flat under a damp piece of masonite, thusly:
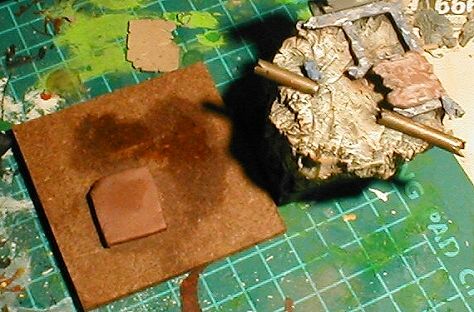
Then simply carved in the detail that I wanted with a hobby knife… chipped away corners, gouged out chunks, carved in cracks, and roughened up the surface a little. The end result is almost the same pattern as I had with the cardboard, but much thicker…
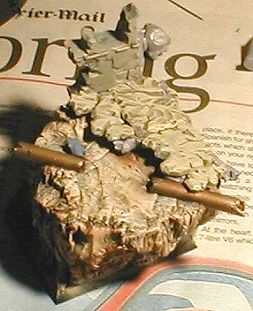
Slapped a quick basecoat onto the tiles to see how they would look…
That’s all I’ll be doing to the base for now… Tonight I’ll start putting the Marines together. I wanted them interacting with the base so that they looked like a part of it, rather than just a couple of models slapped onto a rock, which is why I’ve been concentrating on the base so far. Now that I’ve got the bare bones done, I can put the Marines in, and then go back and do the detail work on the base…
Next: The Marines.