


I picked up a stack of Epic and old Titan Legions stuff a while back, from a guy who clearly had way too much superglue and wanted to get rid of it all…(If the amount on the models was any indication) In amongst it all were two particularly large lumps of superglue, each held together by a plastic Ork Mega Gargant. At the time I bought this lot, I fully intended to get into Epic. Since then, I’ve kind of gotten bogged down with trying to finish off my 40k armies, and so Epic went on the back burner.
The one thing my Ork army is really lacking at the moment is a dredd… so, here goes.
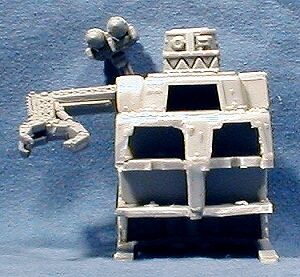
First, take one pre-assembled Mega Gargant…
Then, rip off all the bits you don’t need…
This leaves you ready to start slapping on armour plates, and reattaching weapons in an effort to make it look more like a 40k scale machine…
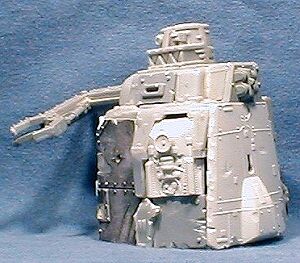
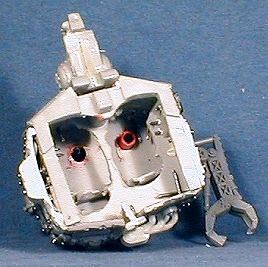
I started by cutting off any detail that gave away the scale, such as hatches and ladders. I then cut away the front and sides, leaving just the support structure.
I then had a burrow through my vehicle bits box (I collect model kits, whenever I can find them cheap. I’ve found a good box of assorted tank, car, and plane parts to be invaluable for building Ork vehicles, scenery wrecks, machinery, and throwable stuff to distract the cat) and started re-building the detail of the shell.
I use a rather advanced technique here, which consists of grabbing an interesting piece from the bits box, and saying “hmm, where can I fit this on?” and just slapping it in there wherever it will fit…
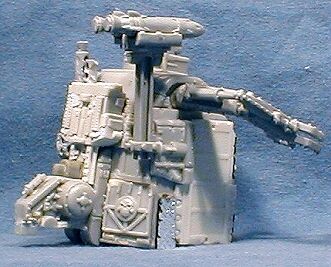
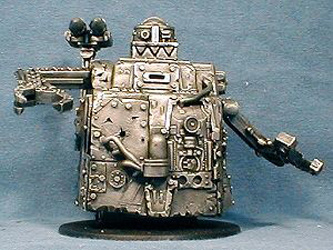
The end result was something like this:
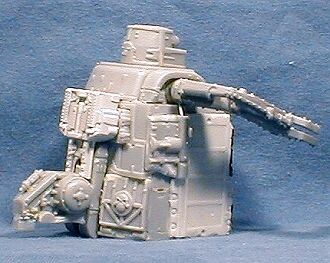
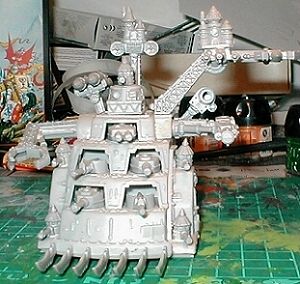
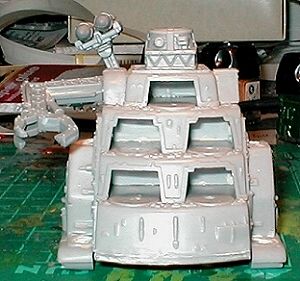
Once the basic shell is back in place, it’s time to start adding detail. Again, this consisted of grabbing likely looking pieces, and trying to fit them together. This serves the dual purpose of making the outside of the dredd look more interesting, and of covering over the gaps left where the larger plates didn’t fit together quite right.
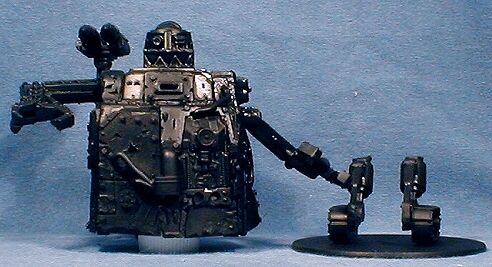
Next came the legs. I had decided to make the dredd run on tracks, rather than trying to build legs from scratch. Then it occured to me that, in game terms, that could cause a problem: A nit-picking opponent could claim that a tracked vehicle wouldn’t be as mobile as a legged one, which would mean the dredd wouldn’t fit the needs of the WYSIWYG (What You See Is What You Get) rule… It wouldn’t be able to behave like a walker if it wasn’t really a walker.
After a little thought, and spotting my cat bouncing off the furniture, I had the answer… It would have both tracks and legs!
With this in mind, I went dashing madly around the house, trying to find some telescopic rod I knew was there somewhere. (M eventually found it in the top of the wardrobe… gee, she’s good to me 🙂
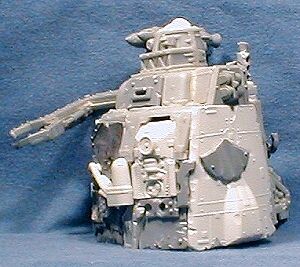
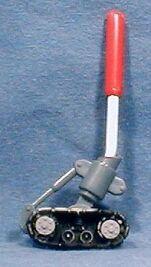
I then built some feet, using tracks from an Ork Warbike, and some runner supports from an old Seaquest DSV model. To this was attached a piece of rod, which would run up a larger piece of rod into the underside of the dredd.
This required the cutting away of a lot of the inner support structure… which is a little tricky once the damn thing’s been assembled. In the end, I used a 3mm drill bit in my rotary tool to grind a couple of large holes through the bottom deck, and then to drill holes through the two upper decks for the larger rod…
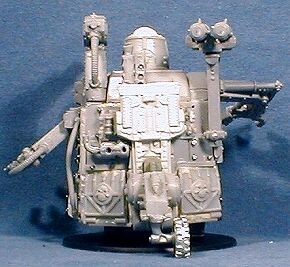
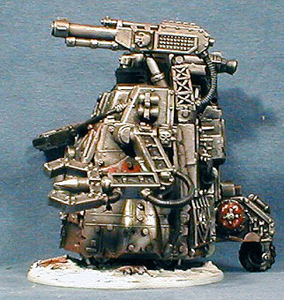
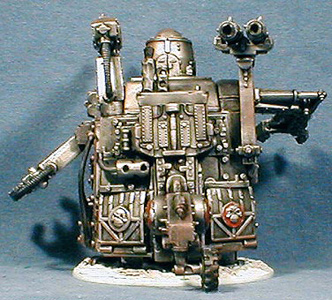
Then, with the addition of a few rivets (made by drilling a heap of 1.5mm holes in likely places, and shoving through small woodworking tacks) and a little more detail work, I wound up with this:
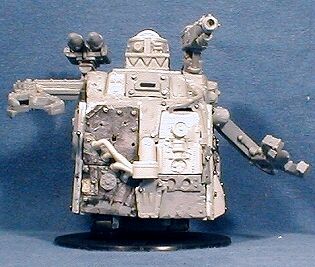
Which just leaves painting…
first off, a quick spray of black:
Then a quick drybrush with Chainmail:
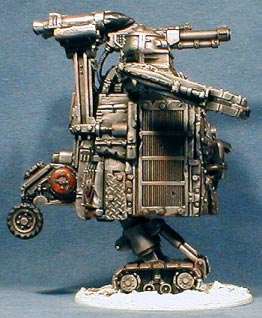
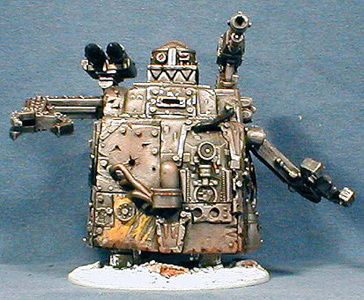
And then just add in the detail. I painted up a few panels here and there in red, yellow, or black, and added scratches back in with chainmail, to look like the panels were ripped off something else and just bolted on. I finished up with a quick highlight of Mithril silver on the hydralics, and a light drybrush over the rest, and then a few touches of a burnt sienna colour that I use for rust.
The base was textured with filling plaster, undercoated Ghostly Grey, and then Drybrushed White. Over this was added a Pearly Glaze (another craft paint) to give it a wet look that probably looks nothing like real snow… (Hey, I live in Queensland, how would I know?)
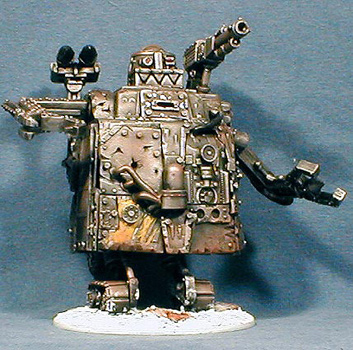
And so, the end result looks like this:
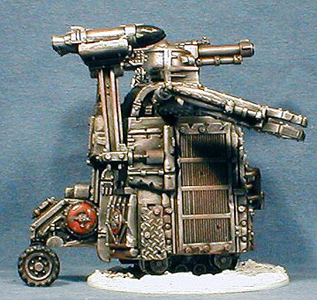
Or, for getting over those pesky obstacles (rocks, fallen trees, Grots, etc…):