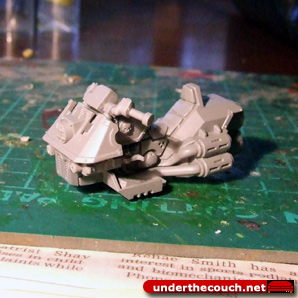
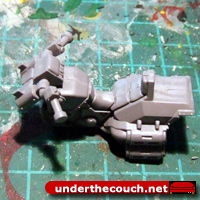
I’ve been looking at alternatives for making cheap and relatively easy Space Marine Jetbikes. After a bit of tinkering, this is what I came up with.
You’ll need a Space Marine bike (I’m working here with a bike that I had previously cut the front mudguard off for a Quad conversion) and a Space Marine jetpack.
You will also need some 1mm thick plasticard, a steel ruler and pencil for marking the plasticard, a hobby knife, a panel scriber (used to score lines in plasticard. A hobby knife will do the job if you don’t have one), and plastic cement.
 |
Step 1:
Cut the front forks and mudguard off the bike chassis, and assemble the two chassis halves and the handlebars as normal. |
|
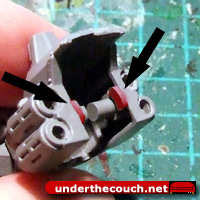 |
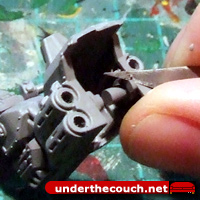
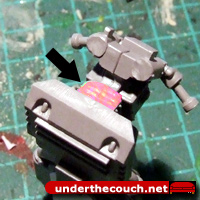
Step 2:
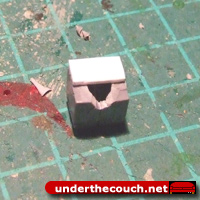
At the back of the bike, you will find two small, kidney-shaped pieces behind the rear axles, that protrude slightly to the back of the rear mudguard (shown in red in the pic to the left). Slice these down flush with the back of the mudguard. |
 |
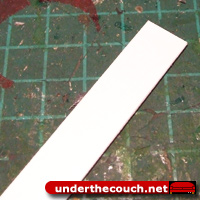 |
Step 3:
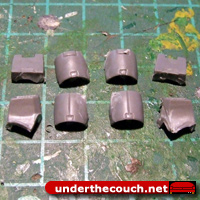
Mark out and cut a strip of plasticard that is 12mm wide. The easiest way to do this is to mark out the width with the ruler and pencil, and then scribe down your pencil line with the panel scriber or knife down the length of the plasticard. Then just snap the strip of plasticard off. |
|
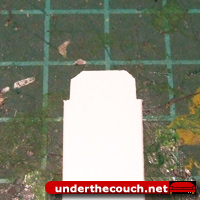 |
Step 4:
Trim the corners off one end of the plasticard strip at a 45 degree angle. Then cut 1mm indents running along the sides of the strip. You will need to check the length of these against the rear mudguard… The wider part of the strip should sit flush on the back of the mudguard, while the narrower section at the end fits up inside the top of the mudguard, as shown to the right. |
 |
 |
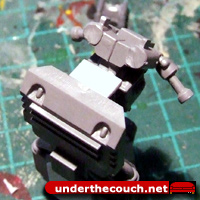
Step 5:
Cut the strip off flush with the bottom of the mudguard, and glue it in place. |
|
 |
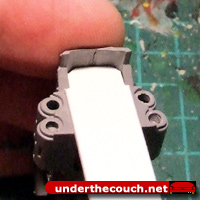
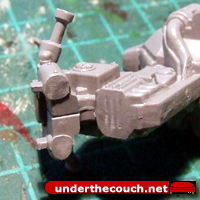
Step 6:
Cut a second piece to run along the bottom of the mudguard. This should also have trimmed-off corners on the front end (to match the shape of the front panel of the mudguard), and should sit flush with the strip at the back, and far enough back from the front edge of the mudguard for the bike’s foot-panel to sit in place. |
|
 |
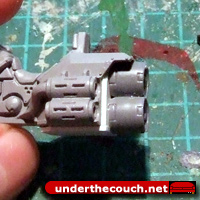
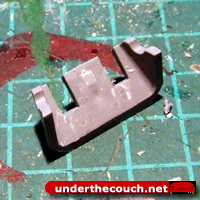
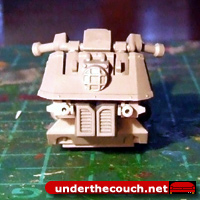
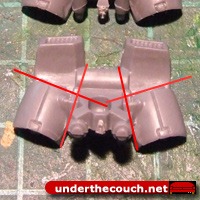
Step 7:
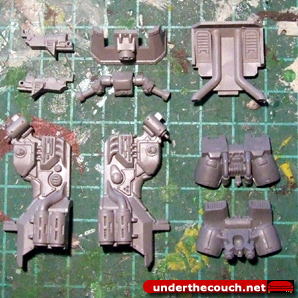
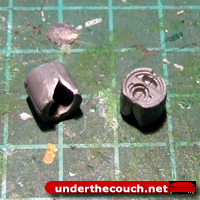
Take the jump pack and cut away the jets and the intakes along the red lines as shown below. That should leave you with the pieces as shown to the left.
|
|
 |
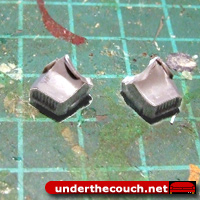
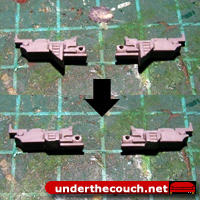
Step 8:
Glue the jet halves together. There will be a damaged piece, where the jet was cut away from the backpack. Once the glue has set, cut a slice away from this damaged side of the jet, to give a flat surface for the two jets to be glued together. If you’re a little unsure about cutting it straight and flat, lay a piece of fine sandpaper on a flat surface and just sand the jet sides down instead. |
 |
 |
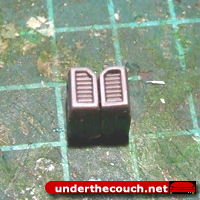
Step 9
Glue the two joined jets vertically to the plate on the back of the bike’s rear mudguard. |
 |
 |
Step 10
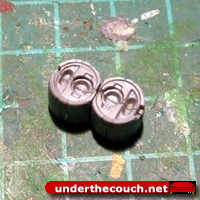
Glue the jump pack intakes together. You will see that one side has a partial curved piece from the packpack remaining. Once the glue is set, cut (or sand) this side of each intake down flat, and then glue the intakes together as pictured to the right. |
 |
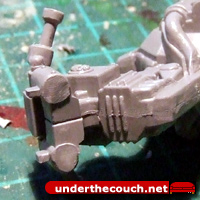 |
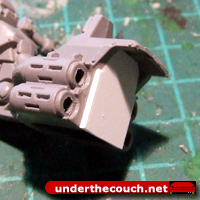
Step 11
On the front of the bike’s engine are three raised ridges. Slice these off so that the front of the engine is flat. |
 |
 |
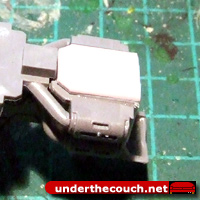
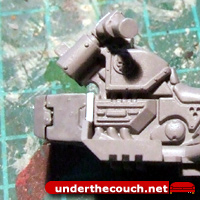
Step 12
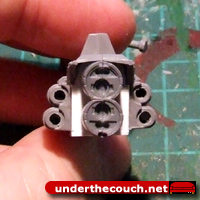
Glue the footplate in place, and then cut a piece of plasticard to fit the part of the engine front that is still showing (coloured red in the picture on the left). |
 |
 |
Step 13
Holding the intakes so that the V-shaped indent is upwards, glue the piece of plasticard to the rear of the intakes, flush with the top surface. |
 |
 |
Step 14:
Glue the intakes to the front of the engine and footplate. |
|
 |
Step 15
On the back of the bike’s front cowling are several protrusions with normally help to locate the cowling correctly on the handlebars. Slice these protrusions off. |
 |
 |
Step 16
The cowling has two cutaways where the bolters normally poke through. On the inside edges of these cutaways that run beside the headlight, slice a 45 degree angle. This will allow the headlight to sit in between the tops of the front forks |
 |
 |
Step 17:
Take the bolters and slice the ammunition feed away flush with the bottom of the bolter. |
|
 |
Step 18:
Glue the cowling in place so that the top of the cowling is level with the top of the forks, and the bottom edge is just above the intakes. Then glue the bolters sideways to the sides of the intakes, right at the top just under the cowling. |
|

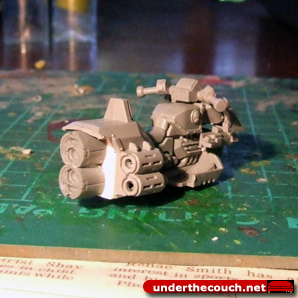
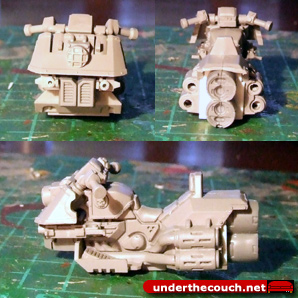
And that’s a basic jetbike. Just add a rider and paint.
It’s a little clunky (although that’s fitting for Imperial technology) and there’s room for a few prettying-up tweaks here and there, or for extra detailing, but has the benefit of not needing any putty work, and is relatively quick and easy to build… handy for putting together large units.